Understanding how users interact with your website is crucial for any business in today’s digital age. Google Analytics 4 (GA4) is a powerful tool that provides valuable insights into website traffic and user behavior, which can help you optimize your site and improve the user experience.
In this blog post, we’ll show you how to connect your WordPress website with GA4, so you can start tracking and analyzing your website data. We’ll guide you through the process step by step, providing instructions and troubleshooting tips to make the process as smooth as possible. Whether you’re a website owner, marketer, or developer, connecting WordPress with GA4 is essential to track and analyzing your website data.
Table of Contents
Step 01: Setting up Google Analytics 4
The first step in connecting your WordPress website with GA4 is to set up a GA4 account and create a property and data stream for your website. Here’s how to do it:
- Go to the GA4 website (analytics.google.com) and sign in with your Google account.
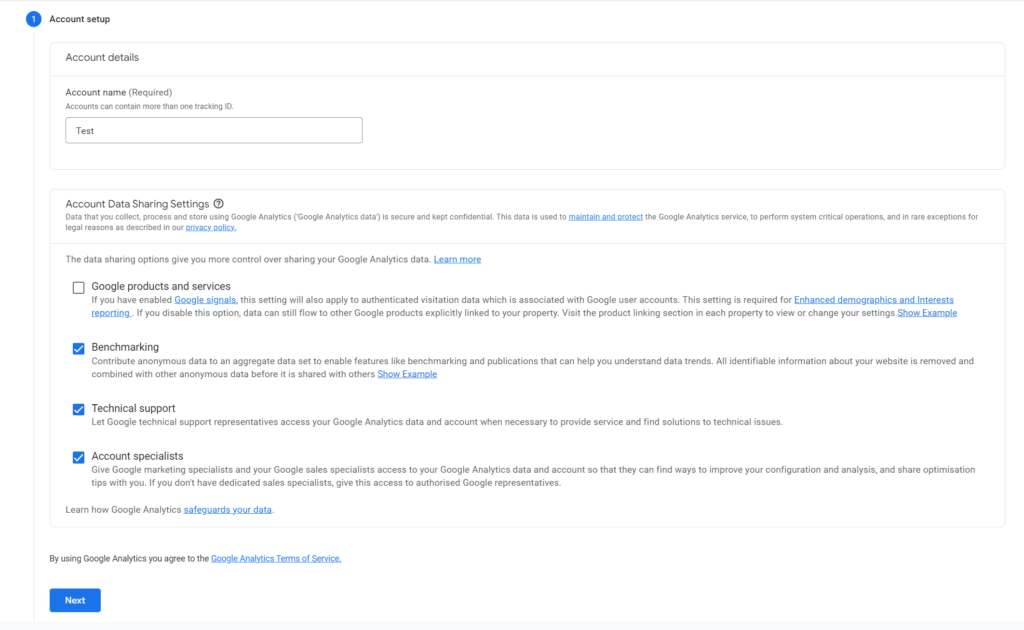
- Click on the “Start measuring” button to create a new property.

- Fill in the required information, including the name and URL of your website.
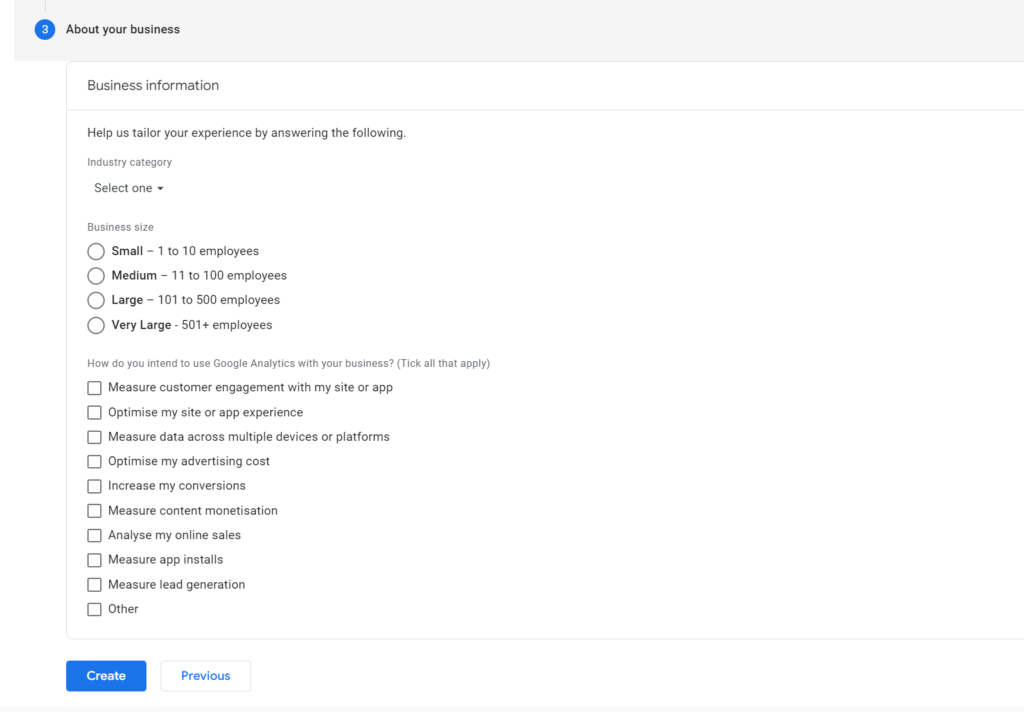
- Select “Web” as the platform.
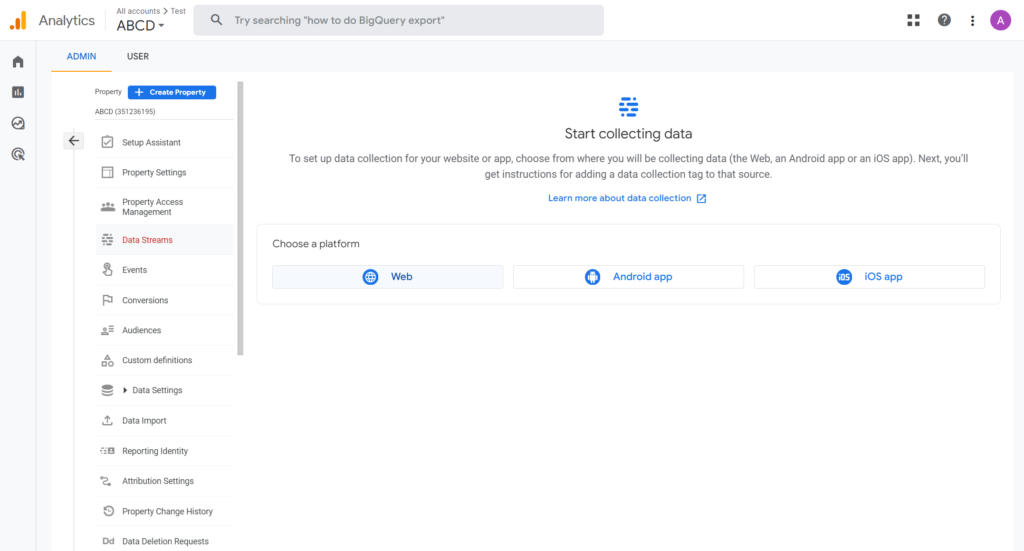
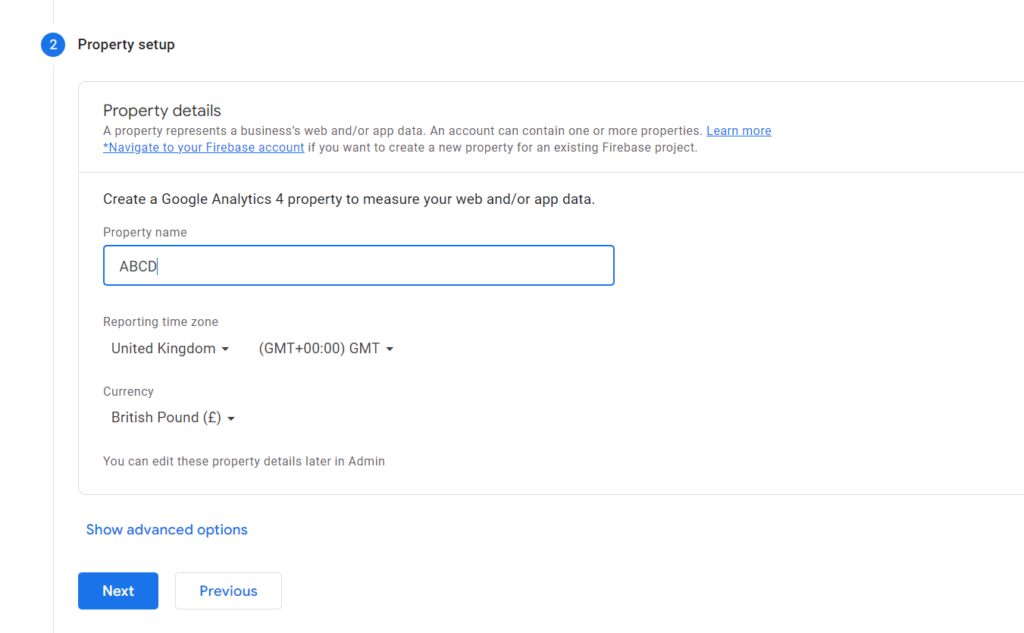
- Once your property on Google Analytics is created, you’ll be redirected to the GA4 property overview page. You can set up a data stream for your website by clicking on the “Web” button.
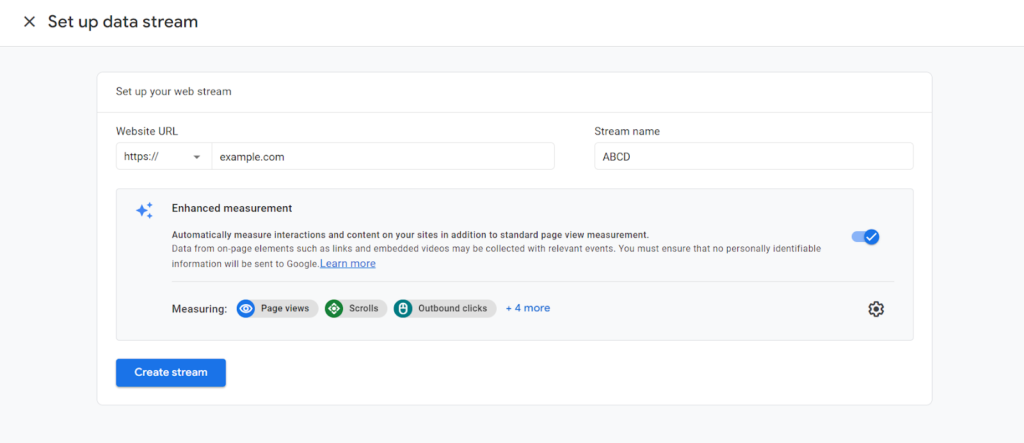
- Fill in the required information, including the name and URL of your website, and then click “Create.”
- Next, you’ll need to retrieve the GA4 tracking code for your website. To do this, click on the “Tracking Code” or “MEASUREMENT ID” tab on the property overview page.
- Copy the tracking code and save it for later use when you install the GA4 WordPress plugin.
9. Once you’ve set up your GA4 account, created property, and set up a data stream for your website, you’re ready to move on to the next step: installing the GA4 WordPress plugin.
Following these steps, you can set up a GA4 account, create a property and data stream for your website and retrieve the GA4 tracking code. This tracking code will connect your website with GA4 in the next step when you install the GA4 WordPress plugin.
Must Read: Maximise Your Earnings: Ultimate Guide to Affiliate Marketing
Step 02: Installing the GA4 WordPress plugin
With your GA4 account set up and the tracking code retrieved, the next step is to install a GA4 WordPress plugin to connect your website with GA4.
There are several GA4 WordPress plugins available, including:
- Site Kit by Google
- Google Analytics for WordPress by MonsterInsights
- GA Google Analytics
- GA4 for WordPress
- GA4 for WordPress by Nelio
Each of these plugins offers different features and options, so choose the one that best suits your needs.
Step-by-step instructions for installing and configuring the plugin:
- Log in to your WordPress dashboard and go to the “Plugins” menu.
- Click on “Add New” and search for the GA4 plugin of your choice.
- Click on “Install” and then “Activate” the plugin.

- Once the plugin is activated, you’ll need to configure it by entering your GA4 tracking code and other necessary settings. You can typically find this option in the plugin’s settings page, which is usually located under the “Settings” or “Analytics” menu in your WordPress dashboard.
- Note:If you straggling to find your UA Code and Measurement ID, Your can use easy way to connect wordpress to GA4 by clicking “Connect MonsterInsights”
- In the plugin’s settings page, enter your GA4 tracking code, save the changes, and verify the connection.
Troubleshooting tips for common issues:
- Ensure that the GA4 tracking code you use is correct and belongs to the right property.
- Double-check that you have entered the code correctly into the plugin’s settings page.
- Ensure that your website is not blocking the GA4 tracking code from running. Check that any ad-blocker or privacy-enhancing browser plugins are not blocking the GA4 script.
- If you cannot verify the connection, check that the GA4 plugin is configured correctly and that you have granted the necessary permissions.
- Check the plugin documentation or support forums for more information if you still face issues.
By following these steps and troubleshooting tips, you should be able to successfully install and configure the GA4 WordPress plugin and connect your website with GA4.
Step 03: Verifying the connection
Once you’ve installed and configured the GA4 WordPress plugin, it’s essential to verify that the connection between your website and GA4 is working correctly.
Here’s how to do it:
1: Checking that the GA4 tracking code is installed correctly on your website:
- Open your website’s browser developer tool (F12) and navigate to the “Network” tab.
- Reload your website and look for a request named “collect” in the network tab of the developer tool.
- If you see a request named “collect” in the network tab, the GA4 tracking code is installed correctly on your website.
2: Validating the data stream in your GA4 account:
- Go to your GA4 account and navigate to the property overview page.
- Select the data stream that you created for your website.
- Verify that the data is being collected and shown in the real-time report.
- If data is being collected and displayed, it means that the GA4 plugin is sending data to the GA4 account properly.
By verifying the connection, you can ensure that your website is appropriately connected to GA4 and that data is being collected correctly. If you have any issues, you can refer to the troubleshooting tips in previous sections or check the plugin documentation or support forums for more information.
Tips: Using GA4 with WordPress
Now that your WordPress website is connected to GA4, you can start taking advantage of all the powerful features and capabilities that GA4 has to offer. Here’s an overview of some of the new features and capabilities of GA4, as well as best practices for using GA4 with WordPress to track website traffic and user behavior, and tips for creating custom reports and analyzing the data in GA4.
1: Overview of the new features and capabilities of GA4:
- GA4 offers new features such as enhanced measurement capabilities, automatic data collection, and improved data privacy controls.
- GA4 also includes new data models and reporting options, including analyzing user engagement and conversion funnels.
- It also includes a new “events” feature, which allows you to track specific actions on your website.
2: Best practices for using GA4 with WordPress to track website traffic and user behavior:
- Use GA4 to track user behavior on your website, such as which pages are visited most often and how long users stay on your site.
- Use GA4 to track conversion rates and analyze which pages or actions lead to the most conversions.
- Use GA4 to track user engagement and measure how engaged users are with your website.
3: Tips for creating custom reports and analyzing the data in GA4:
- Use the custom reports feature to create reports tailored to your specific needs.
- Use data visualization tools to analyze the data and gain insights into user behavior.
- Use the data export feature to other tools for further analysis.
By using GA4 with WordPress, you can gain valuable insights into how users interact with your website, track website traffic, and measure the success of your online marketing efforts. With the powerful features and capabilities of GA4, you can optimize your website, improve the user experience, and make data-driven decisions to grow your business.
Conclusion
Connecting your WordPress website with Google Analytics 4 (GA4) is essential for tracking website traffic and user behavior and understanding how users interact with your site.
By following the steps outlined in this blog post, you can set up a GA4 account, create a property and data stream for your website, install and configure a GA4 WordPress plugin, and verify the connection. By doing so, you can start tracking and analyzing your website data and gain valuable insights into how users interact with your website.
We encourage you to try it out and see the benefits that GA4 can bring to your website. Please let us know in the comments section if you have any experience or feedback you would like to share.
FAQs
Q1: Does WordPress support GA4?
Ans: Yes, But you need to set up a GA4 property in your analytics account then it’ll start collecting data from your website.
Q2: Which plugin to add GA4 in WordPress?
Ans: There are so many plugins available that will help you connect GA4. But here are a few best plugins ‘Site Kit by Google, Google Analytics for WordPress by MonsterInsights, and GA4 for WordPress by Nelio’.
Q3: Does GA4 affect SEO?
Ans: GA4 doesn’t affect your SEO directly, but we recommend you at least set up a GA4 property on your WordPress website. So, that it can collect data from your side. Even if you still use Universal Analytics, it’s recommended to set up GA4.
Q4: Can Google Analytics 4 be used in conjunction with other analytics tools simultaneously?
Ans: Yes, Google Analytics 4 can be used simultaneously with other analytics tools. For example, you can use both Google Analytics 4 and Universal Analytics simultaneously for now. This is called “dual tagging” and means adding Google Analytics 4 (GA4) tracking onto your website in parallel with your existing Universal Analytics tagging.